
Using Windows Backup on Windows 7 is an easy way to save your important files and create a backup of your computer. Let’s go through the process step by step in simple terms.
- Press the Windows Logo: At the bottom of your screen, press the Windows logo (the flag-shaped button).
- Go to Settings: Click on the “Settings” option you’ll find on the left side of the Start menu.
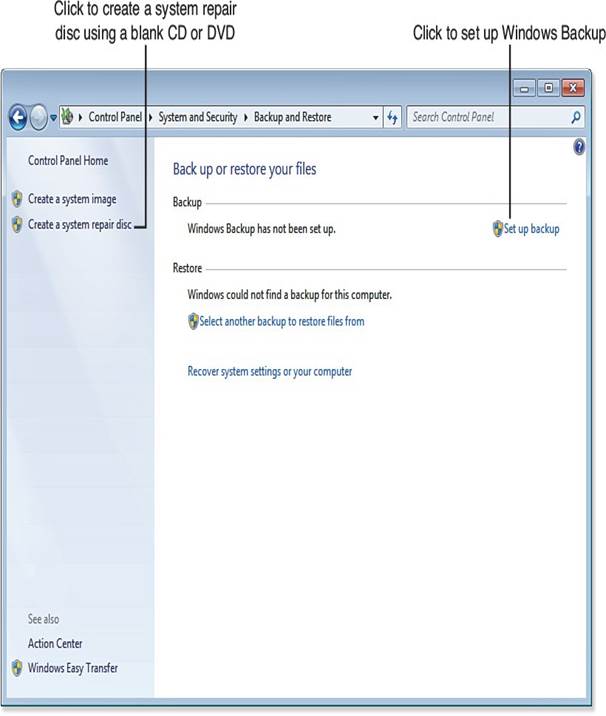
- Find Backup Options: In the Settings menu, look for an option labeled “Backup.” It might be under a section like “System.”
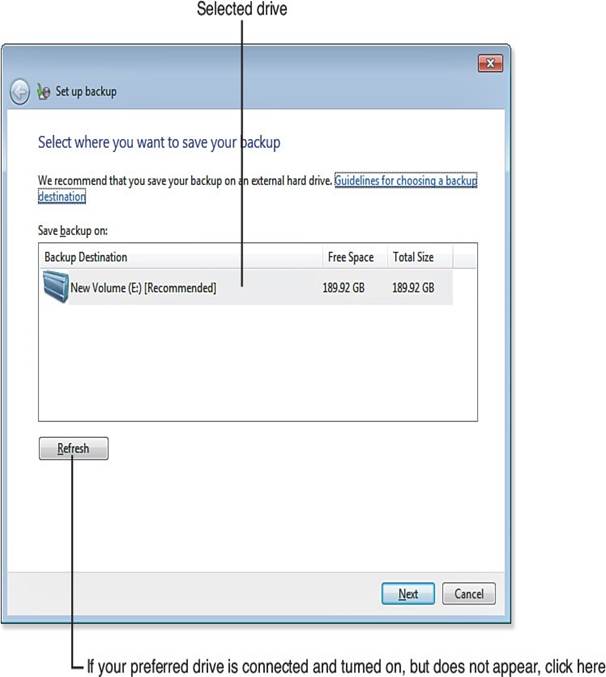
- Connect Your Backup Device:
- If you’re using an external hard drive or USB stick, plug it into your computer.
- Make sure the drive shows up on your screen (you might see the device name appear near the connection points).
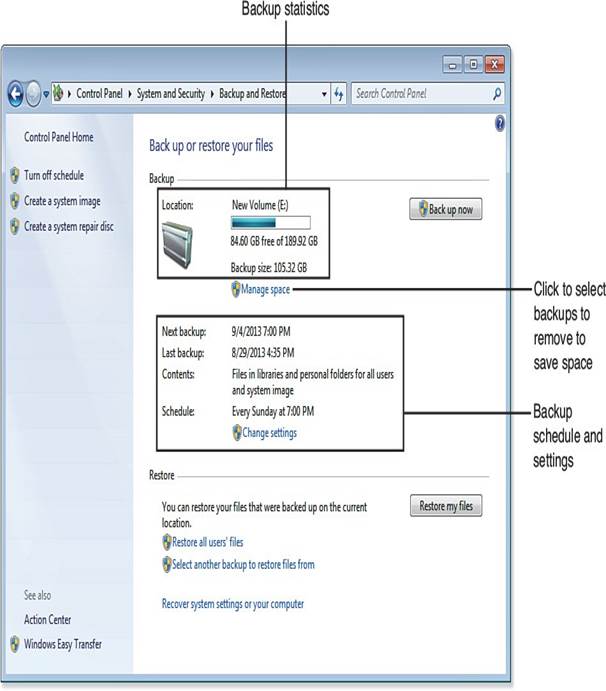
- Start Backing Up:
- Click on “Backup Now” or whatever button is labeled for backing up your files.
- Choose where you want your backup to go. It can be on your external drive or another location if needed.
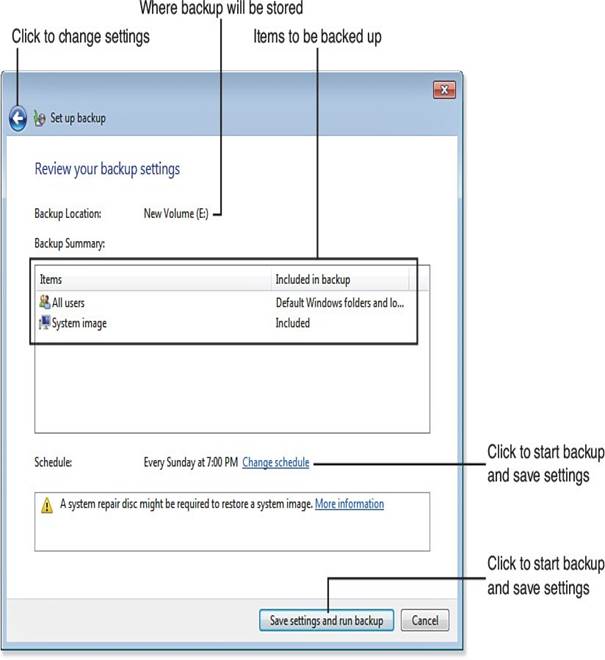
- Review and Complete: After selecting your backup location, follow any additional instructions to ensure everything is set up correctly.
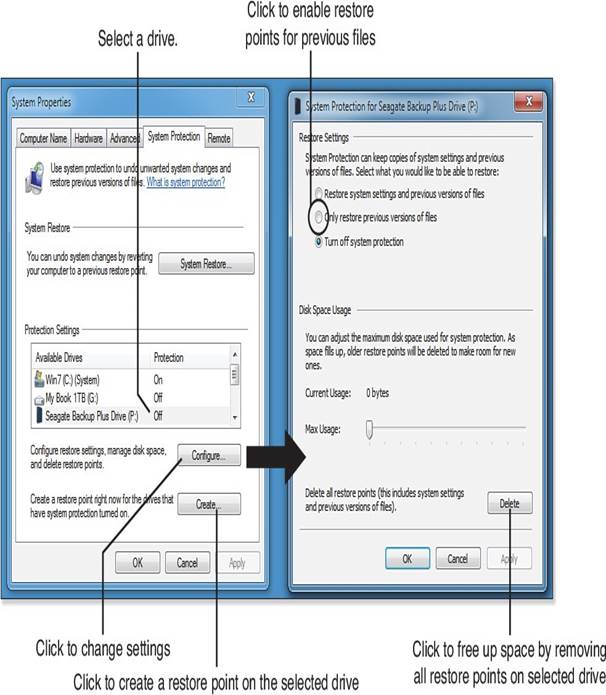
- Create an Emergency Backup Disk:
- If you need to restore your computer in the future, create a special backup CD or DVD using the Windows 7 installation disc.
- This is especially important if you have Windows pre-installed and might not have access to external drives during recovery.
- Save Your Work: Once everything is set up, your files will be copied to the chosen location. You’ll get an update on how much of your backup is complete.
By following these easy steps, you can protect your important files and ensure that your computer stays running smoothly for years to come!