
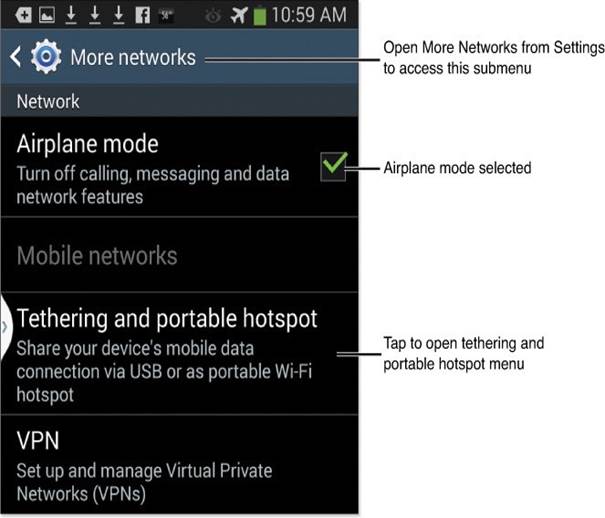
If you can’t connect your mobile device to Wi-Fi or a cellular network, it might be in Airplane mode. Airplane mode turns off all wireless signals on your device, including Wi-Fi, Bluetooth, and cellular connections. This feature was created so people could use their devices during flights, but it has other benefits too:
- Longer battery life
- Increased privacy
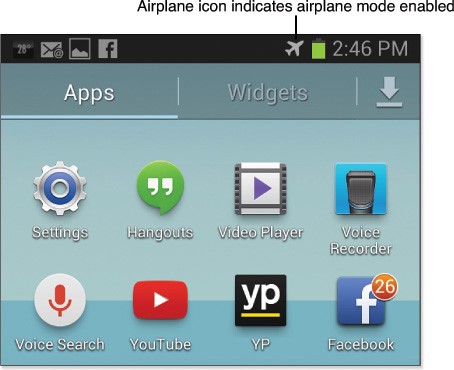
When Airplane mode is on, you’ll see a small airplane icon on your device’s screen.
To turn on Airplane mode, go to the Settings menu on your device. On Windows 8/8.1, you can find it in the Networks menu.
By default, Airplane mode disables all communication, but you can still turn on Wi-Fi or Bluetooth if you want. This is useful if you’re traveling outside your cellular network area or in another country, as it can help you save money.
Switching Connection Types Manually
When using a mobile device that has both Wi-Fi and cellular data, remember that you can only use one at a time. Usually, Wi-Fi is on all the time and connects automatically when you return to a familiar hotspot, like your home or school.
However, if you find yourself connected to a weak Wi-Fi signal that doesn’t work well, but you have a strong cellular signal, you can switch to cellular data by following these steps:
- Go to your device’s Settings and turn off Wi-Fi.
- Your device should automatically connect to the cellular network.
- When you’re back in an area with a strong Wi-Fi signal, turn Wi-Fi back on.
Mobile Hotspots and Connection Security
You might see signs for “Free Wi-Fi” in places like hotels, restaurants, and coffee shops, but be careful using these networks. They are often not secure, which means your personal information, like emails and bank details, could be at risk. Free Wi-Fi is fine for casual browsing, but it’s not safe for important tasks like online banking.
If you have a secure remote connection service on your home or office computer, like Go To My PC, you can use that to check emails or shop online safely by accessing your remote computer.
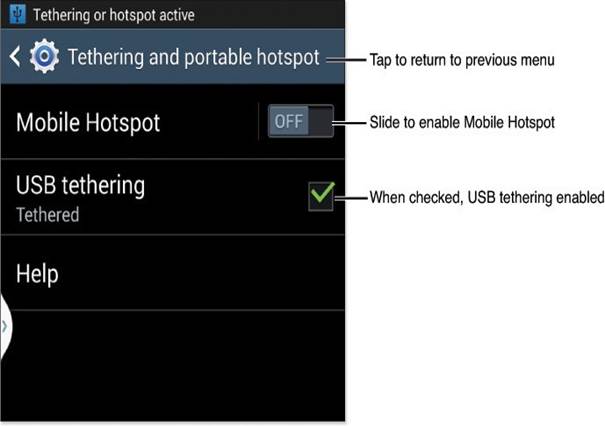
Using Your Device as a Hotspot
If you have a smartphone, tablet, or laptop that can share its cellular data, you can create a secure connection for other devices. You can share your connection with one device using USB tethering or with multiple devices using the Wi-Fi hotspot feature.
Using USB Tethering
To use USB tethering, follow these steps:
- Connect a USB cable from your computer to your device.
- Turn on the USB tethering option on your device.
- If you’re using a Windows computer, select the network type (Home) when prompted.
- Use your computer’s web browser and other network features as usual.
- When you’re done, turn off USB tethering.
In the Device Manager, you’ll see the tethered connection listed as a Remote NDIS based Internet Sharing Device.
Using a Wi-Fi Hotspot
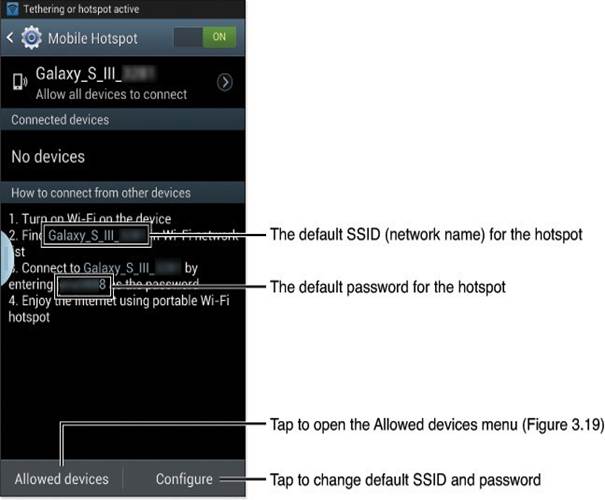
To use the mobile hotspot feature, do the following:
- Turn on the mobile hotspot feature.
- Choose how you want to share your connection wirelessly.
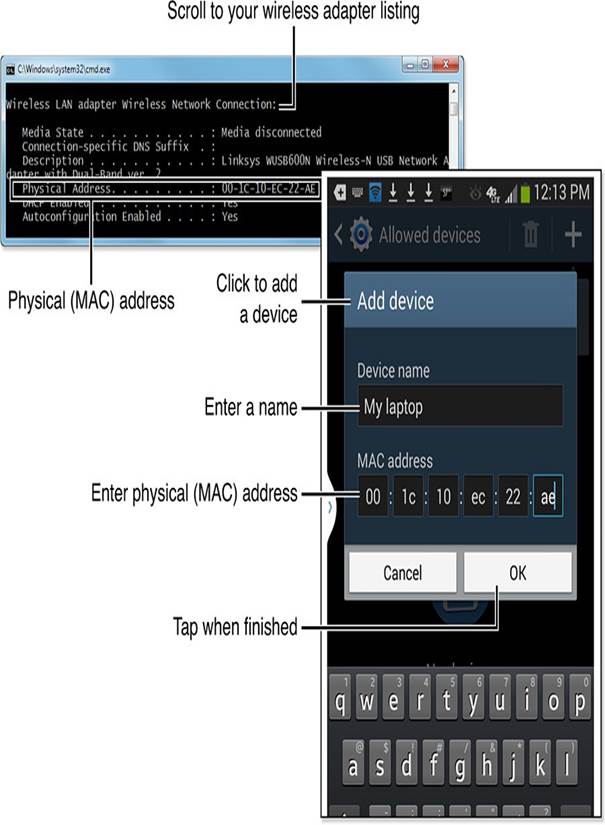
- If you want to allow only certain devices to connect, you’ll need to provide a name and MAC address for each device. The MAC address can usually be found on a label or by using the command prompt on your computer.
- Open the Allowed devices menu, add the MAC address, and save it.
- Each device will need the SSID (network name) and password to connect to your hotspot.
- Connect just like you would to any other Wi-Fi network by entering the password when asked.
- When you’re finished using the internet, remember to turn off the hotspot feature.
Caution
Some mobile providers may charge extra fees for using your device as a hotspot. Check with your service provider for details. Also, keep in mind that all data used by devices connected to your hotspot counts toward your data limit, so be careful to avoid extra charges.