
Introduction: File History is a feature in Windows 8/8.1 designed to simplify file backup and restoration processes, making it easier for users to manage their data securely. This guide provides a straightforward approach to setting up File History, tailored for junior high and high school students.
Materials Needed:
- External hard disk (with sufficient storage capacity)
- Access to a Windows 8/8.1 computer
- Internet connection (for optional updates and information)
Step-by-Step Instructions:
- Connect the External Hard Disk:
- Plug your external hard disk into your computer’s USB port.
- Wait for the drive to appear on your computer screen, typically under “This PC” or “My Computer.”
- Access Control Panel:
- Click on the Windows logo (usually a flag) at the bottom of your screen.
- In the menu that appears, select “Control Panel.”
- Navigate to Backup Settings:
- In the Control Panel, click on “System and Security.”
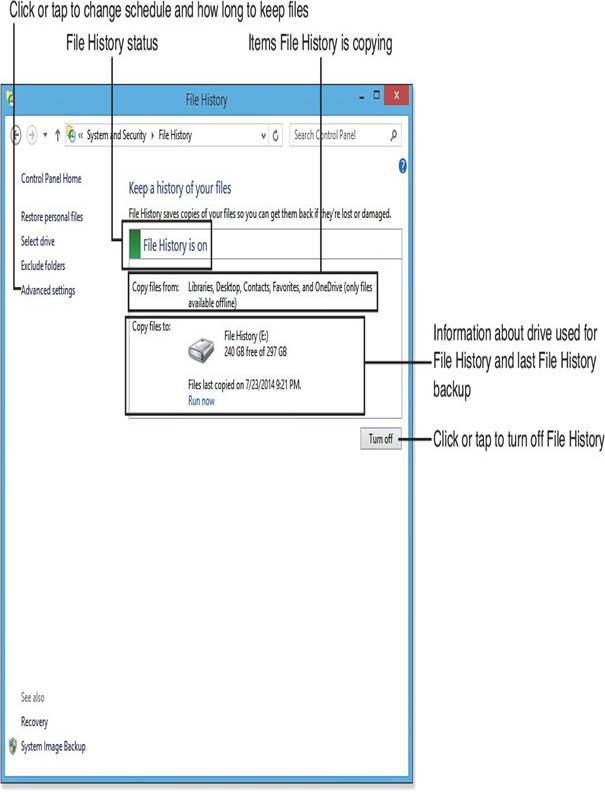
- Look for and click on “Backup” or “File History” in the System section.
- Set Up File History:
- If using an external drive, File History should automatically detect it.
- If multiple drives are connected, use the “Select Drive” option to choose your primary backup location.
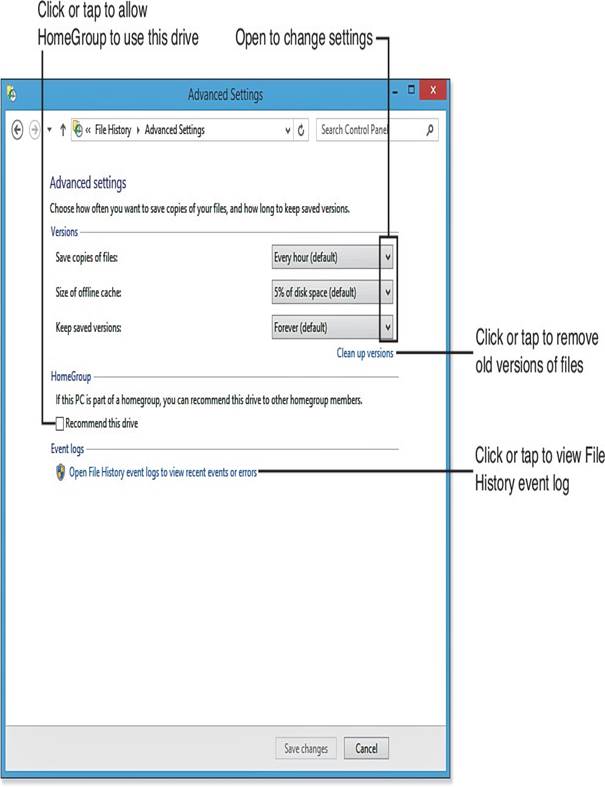
- Adjust Advanced Settings (Optional):
- Click on the “Advanced Settings” link within File History settings.
- Modify backup frequency, cache size, and network access options as needed.
- Schedule Automatic Backups:
- Ensure that backups are set to run automatically or at a specified time.
- Use the “Run Now” option if you need immediate backup.
- Test Your Backup System:
- Delete or move an important file to simulate a data loss scenario.
- Restore the file from File History using the steps provided in the restore guide (located in the same section).
Important Considerations:
- File Types: Understand that not all files are backed up by File History, including encrypted files (EFS), network-located files, and drives that don’t use NTFS.
- Network Access: Decide whether other family members should have access to your backup drive. This can be adjusted in the settings.
Conclusion: By following these steps, you can effectively set up File History on Windows 8/8.1, ensuring your important files are backed up and accessible when needed. This process helps in maintaining data security and peace of mind for students and casual users alike.